Important: If you have an EASYSHARE 5100, 5300, or 5500 printer , see those instructions on installing the printhead.
To replace the printhead in your all-in-one printer:
- Make sure the printer is on.
Important: If you have an ESP 3250 or ESP 5250 printer, go to step 2. For all other models go to step 5. - On the printer control panel, press Home.
- Select Maintenance, then press OK.
- Select Install Ink Cartridges, then press OK.
- Lift the access door and wait for the carriage to move to the access position.
- Remove the black and color ink cartridges, and set them aside.
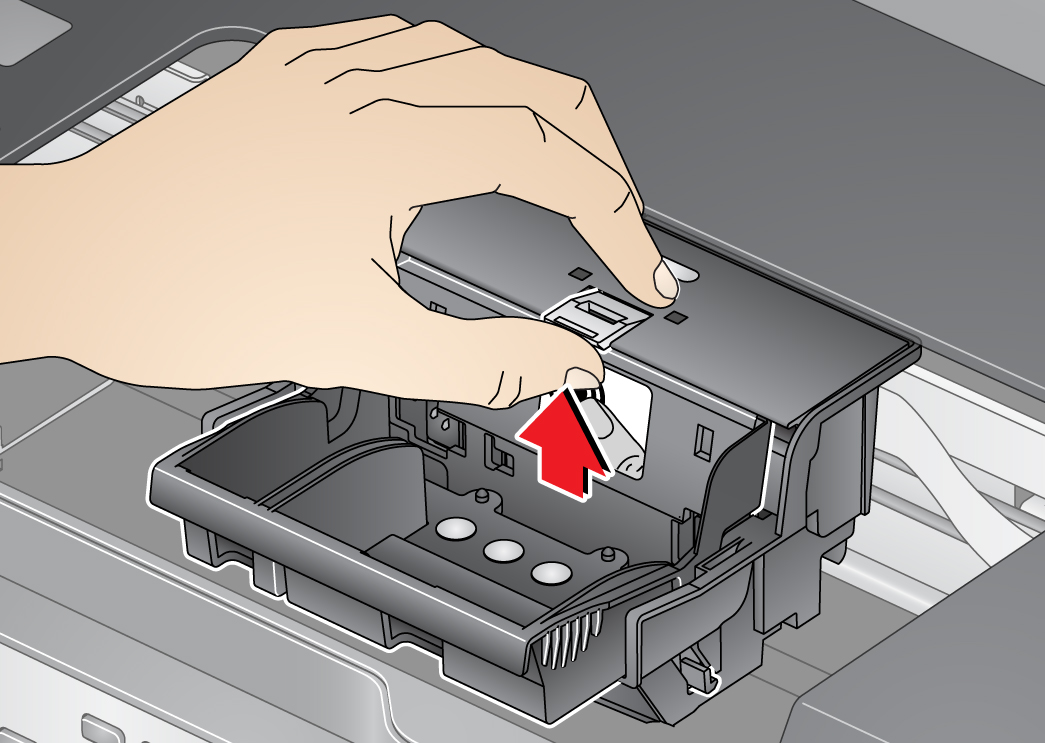
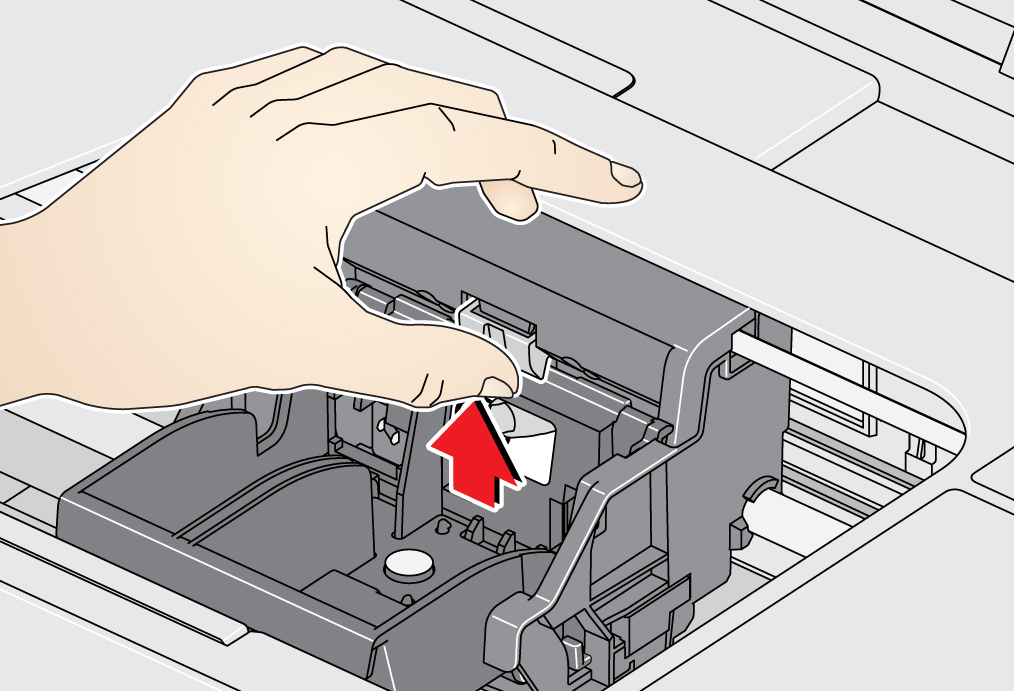
- Remove the the printhead from the carriage.


ESP 3, 5, 7, 9, 3250, 5250, 5210,
Office 6150, 7250, 9250,
HERO 7.1, 9.1, OFFICE HERO 6.1ESP C110, C310, C315, Office 2150, 2170, HERO 3.1, 5.1 - Remove the new printhead from its bag.
- Remove the orange cap(s).
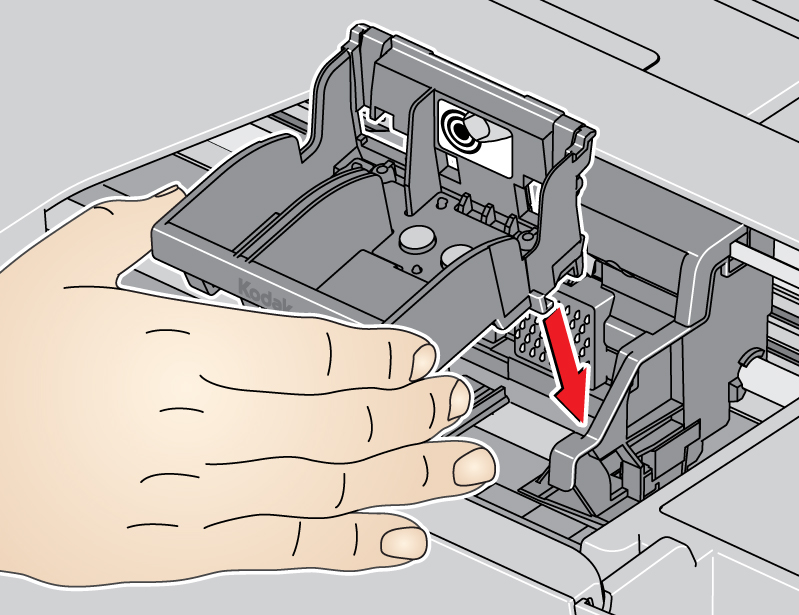
- Install the new printhead into the carriage.

ESP 3, 5, 7, 9, 3250, 5250, 5210,
Office 6150, 7250, 9250,
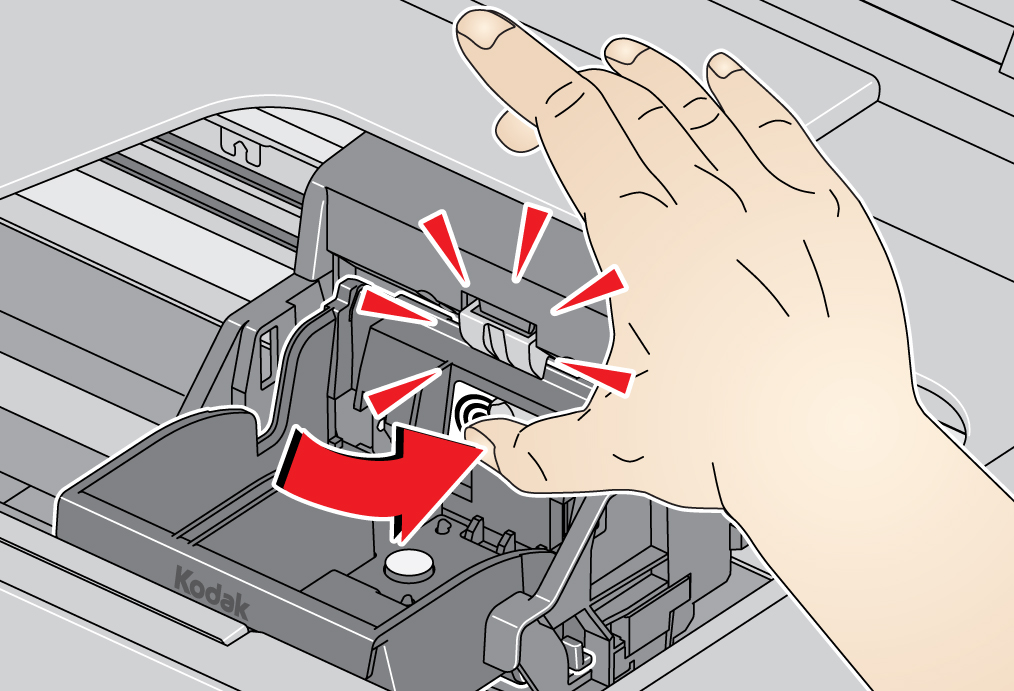
HERO 7.1, 9.1, OFFICE HERO 6.1ESP C110, C310, C315, Office 2150, 2170, HERO 3.1, 5.1 - Push firmly against the target label on the printhead until you hear a loud click.

ESP 3, 5, 7, 9, 3250, 5250, 5210,
Office 6150, 7250, 9250,
HERO 7.1, 9.1, OFFICE HERO 6.1ESP C110, C310, C315, Office 2150, 2170, HERO 3.1, 5.1 - Insert the color ink cartridge into the printhead, and press down until you hear the cartridge click into place.
- Insert the black ink cartridge into the printhead, and press down until you hear the cartridge click into place.
- Close the access door.
Important: ESP 3 all-in-one printers do not require calibration. - Follow the instructions on the LCD to calibrate your printer.
Important: Be sure to use KODAK Ink Cartridges. Your all-in-one printer is designed to work with KODAK Ink Cartridges. Kodak is not responsible for the compatibility or performance of either non-Kodak brand ink cartridges or refilled ink cartridges.


