IMPORTANT: Go to and review 1 - Installing the Printhead and Ink Cartridges.
To replace the printhead:
- Make sure the printer is on.
- Lift the printer access door and wait for the carriage to move to the access position.
- Remove the both ink cartridges and set them aside.
- Unlatch the printhead by lifting the latch in the center of the carriage.
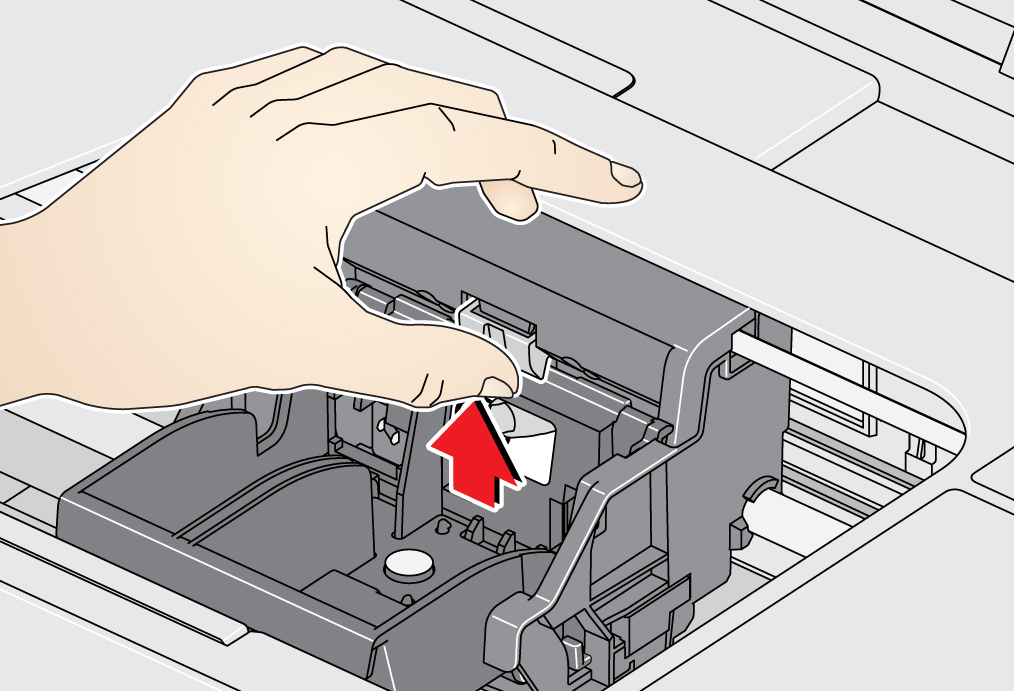
- Lift the printhead out of the carriage.
- Remove the new printhead from its bag.
- Remove the plastic cap.
- Place the new printhead into the carriage.
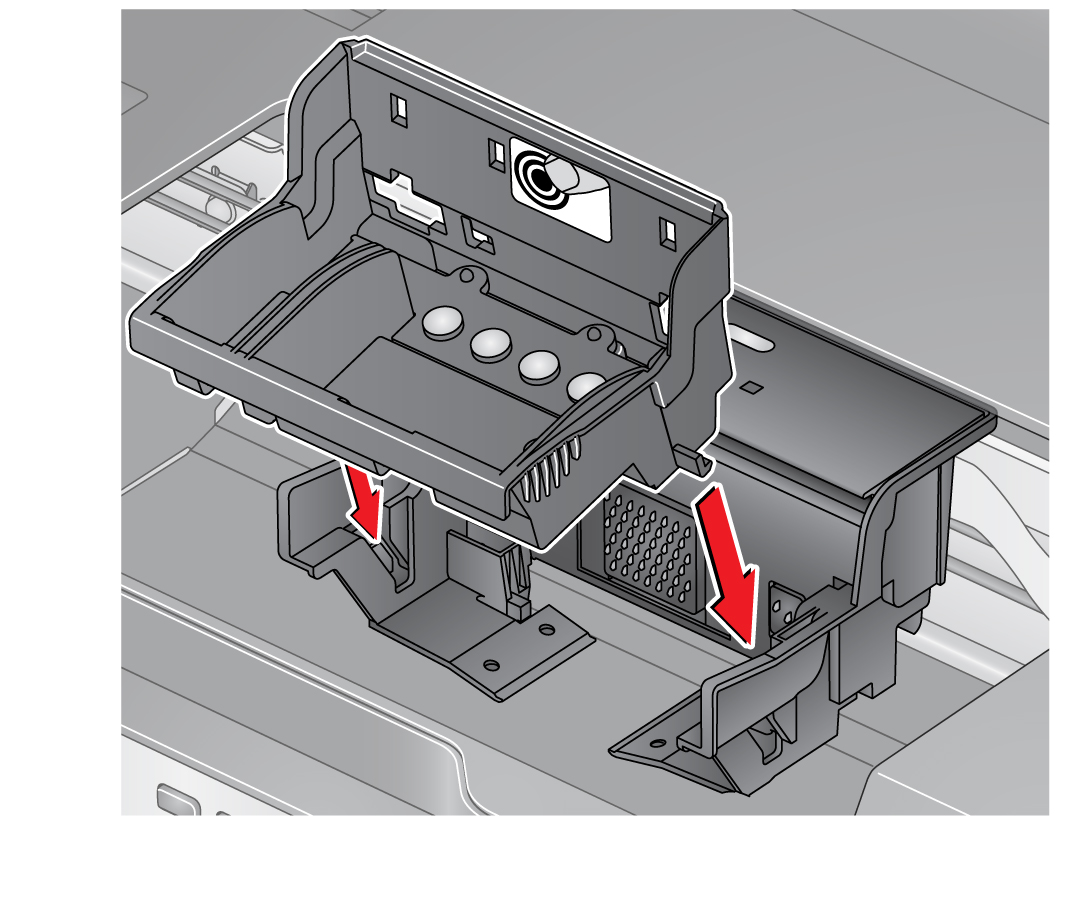
- Push firmly against the target label of the printhead until you hear a loud snap.
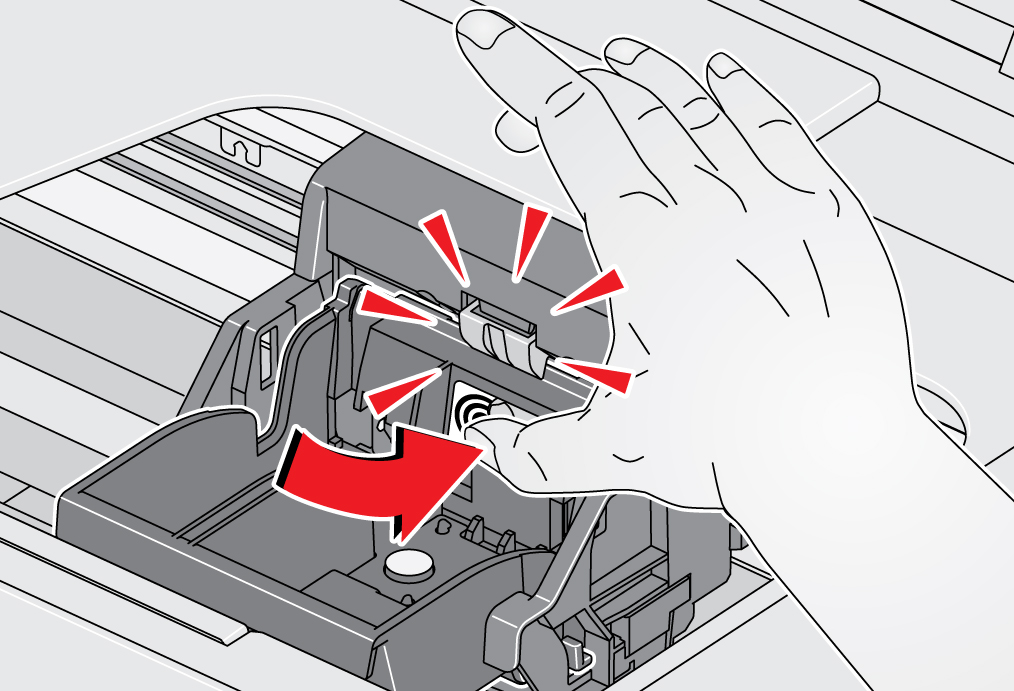
- Insert the color ink cartridge into the printhead.
- Press down on the color ink cartridge until you hear it click into place.
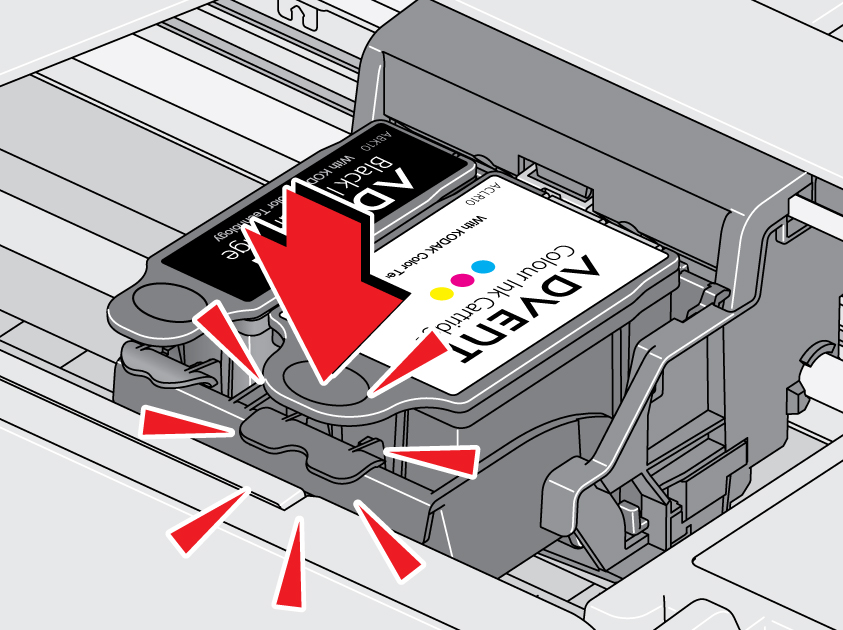
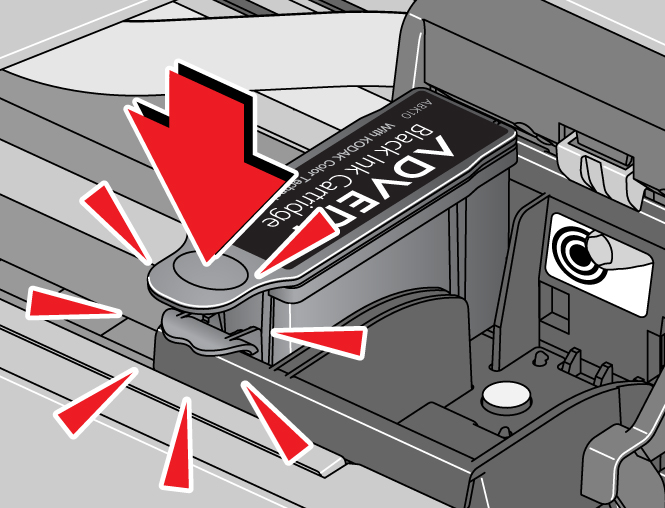
- Insert the black ink cartridge into the printhead.
- Press down on the black ink cartridge until you hear it click into place.
- Close the printer access door.
The printer detects the new printhead. - Follow the instructions on the control panel to calibrate your printer.
IMPORTANT: Your all-in-one printer is designed to work with ADVENT Ink Cartridges. Advent is not responsible for the compatibility or performance of either non-Advent brand ink cartridges or refilled ink cartridges. To purchase ADVENT Ink Cartridges, see
