Not all cameras have the Date Stamp feature.
If you don't find Date Stamp in the Main menu, Setup menu, Review menu, or in your Extended User Guide, then your camera does not have the Date Stamp feature.
IMPORTANT:
- Some models let you add a date stamp only in Review mode, after you take pictures. (See .)
- Some models let you turn on the Date Stamp feature in Capture mode so that all new pictures are stamped. (See below.)
- Check your Extended User Guide to see if your camera has the Date Stamp feature and which type it is.
- Make sure the camera is correctly set. Otherwise, the date stamp will imprint the wrong date.
- You cannot from a picture.
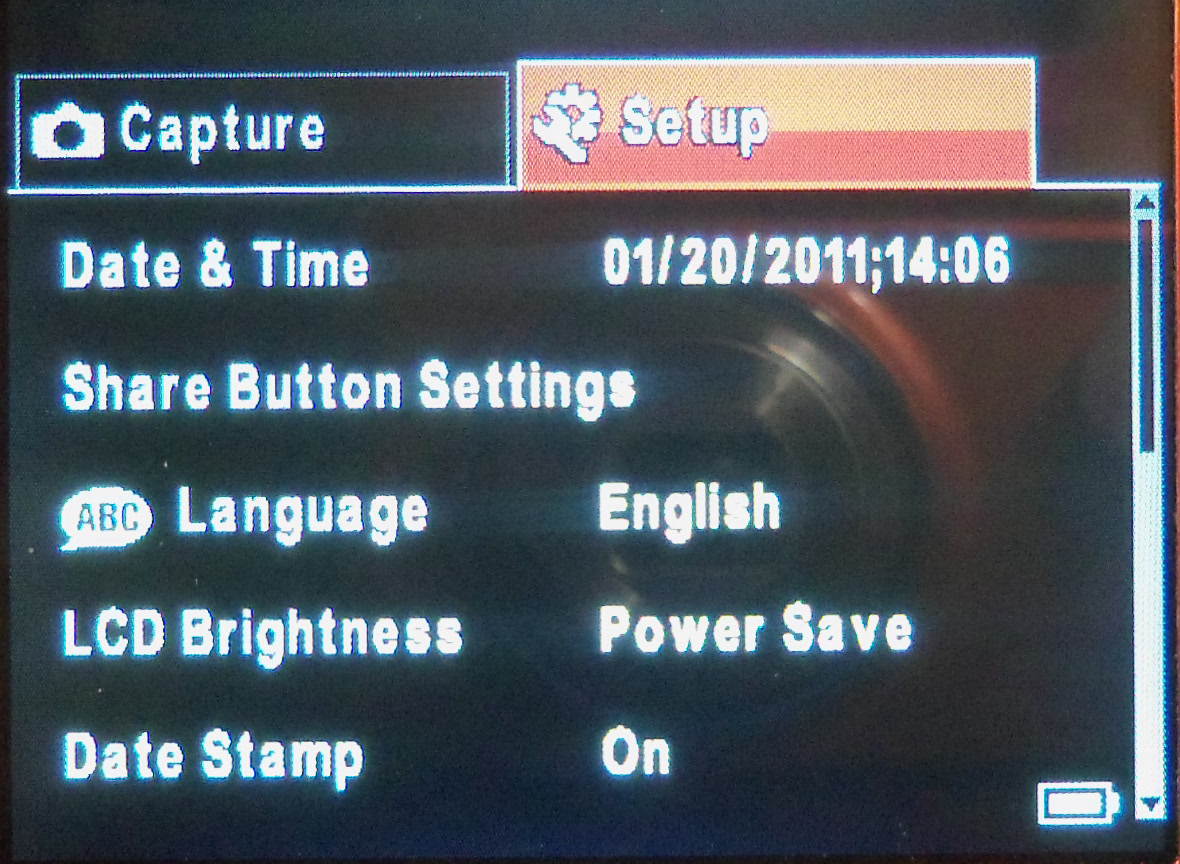
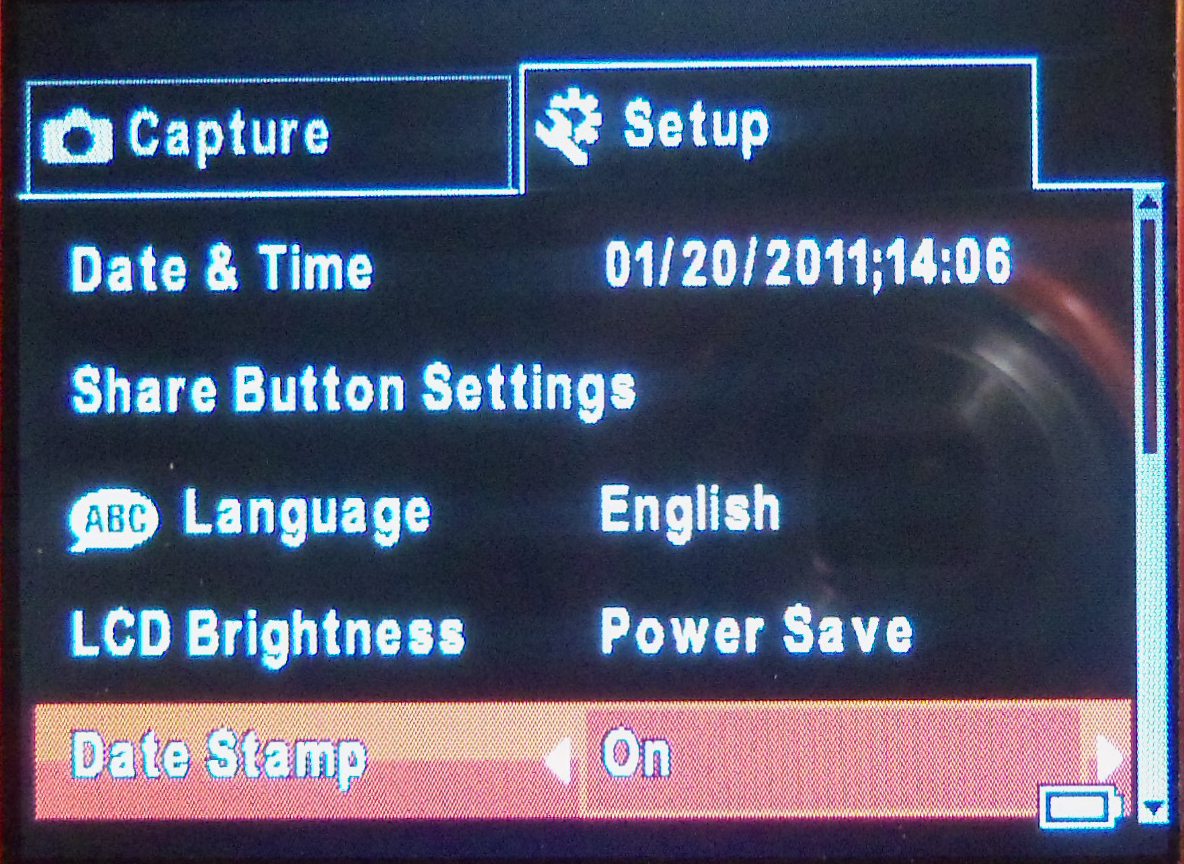
Turn on the Date Stamp feature so that all new pictures are date stamped:
| Step | Example |
Press the Menu button |  |
If your camera displays a menu with tabs at the top:
|
|
If your camera does not display a tabbed menu:
|