- Check that your printer is connected to your wireless network:
- Press the Menu button on the Printer Control Panel.
- Select Network Settings.
- Select WiFi Setup Wizard.
- Follow the prompts on the display to connect to your wireless network. The WiFi LED illuminates a steady blue when the printer is connected to your wireless network.
- Add your printer to the Print & Fax System Preferences using your MACINTOSH Computer.
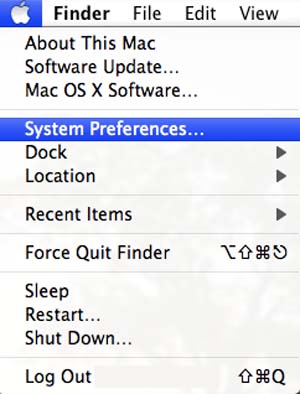
- Select System Preferences... under the Apple menu.

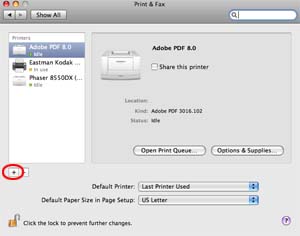
- Select Print & Fax.

- Click "+" to add a printer.

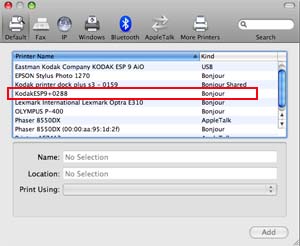
- Select your KODAK ESP 7 or ESP 9 All-in-One Printer listed with the Bonjour connection.

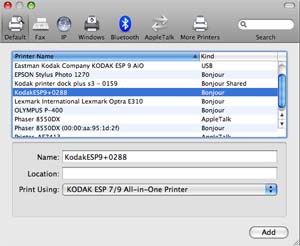
NOTE: If your printer is not listed, follow the steps in the FAQ for to verify that the printer firmware is up-to-date. - Click the Add button when the printer is available.
- The KODAK ESP 7 or ESP 9 All-in-One Printer will be added to the list of available printer.
- The printer will be named "KodakESP7[or 9]+xxxx" where "xxxx" represents four digits that are unique to your printer. The name of the printer with the plus sign and four digits indicates that the printer is for wireless printing.
- Select System Preferences... under the Apple menu.
- Close all windows.
- Select the ESP 7 or ESP 9 printer with the plus sign (+) and four digits after the name of the printer when choosing to print within your wireless network.

Examples:
- KodakESP9+0288 - prints to your ESP 9 printer using a wireless network.

- Eastman Kodak Company KODAK ESP 9 AiO - prints to your USB-connected ESP 9 printer.

